 Screen Divider
How to tile windows on a Mac
macOS can tile windows on its own now. Here’s every built-in way to do it, the shortcuts and settings, and what to use when halves and quarters aren’t enough.
Checked against Apple’s Mac User Guide on October 18, 2026.
Tiling built into macOS
Apple added window tiling in macOS Sequoia (macOS 15, 2024), and it’s still there in later versions. If your Mac runs macOS 15 or later, you can tile without installing anything. Apple’s Tile windows on Mac guide lists these ways:
- Drag to an edge. Drag a window to the left or right edge of the screen to fill that half, or into a corner for a quarter. Drag it to the menu bar and it fills the desktop. (Keep going through the top edge and Mission Control opens instead.)
- Hold Option while dragging. Press Option as you drag and macOS highlights where the window will land before you reach the edge; release on the highlighted area.
- The green button. Hold the pointer over the green button in a window’s top-left corner to see tile layouts. Hold Option to see more.
- The Window menu. Window › Move & Resize has halves, quarters and arrangements for several windows, plus Fill and Center.
Keyboard shortcuts
Apple’s tiling shortcuts use Fn and Control:
| Do this | Shortcut |
|---|---|
| Fill the screen | Fn-Control-F |
| Center the window | Fn-Control-C |
| Left, right, top or bottom half | Fn-Control-Arrow |
| Two windows as halves | Fn-Control-Shift-Arrow |
| Return to the previous size | Fn-Control-R |
Turning tiling on or off
Open System Settings › Desktop & Dock and scroll to Windows. Apple lists four switches there: “Drag windows to left or right edge of screen to tile”, “Drag windows to menu bar to fill screen”, “Hold ⌥ key while dragging windows to tile”, and “Tiled windows have margins” (Change window tiling settings). If tiling gets in the way of a window manager you’ve installed, turning off the first one usually stops the two from fighting over the same drag.
Where built-in tiling stops
macOS tiles to halves, quarters and full screen. That covers a lot. What it doesn’t do:
- Uneven layouts. There’s no built-in two-thirds and one-third, or a wide center column with narrow sides.
- Your own zones. You can’t draw a layout once and keep reusing it.
- Different layouts per display. A portrait monitor and a wide monitor want different arrangements.
If your Mac is on macOS 13 or 14, there’s no edge tiling at all; you have Split View and third-party apps.
Other built-in options: Split View and Stage Manager
Split View puts two apps side by side in their own full-screen space; see how to split screen on a Mac for the steps. Stage Manager keeps the app you’re using in the center and lines the rest up on the side, which suits switching more than side-by-side work.
Keyboard snapping apps
Apps like Rectangle (free) and Magnet snap the active window to halves, thirds and quarters with shortcuts, on older macOS versions too. If equal regions are all you need, they’re quick and dependable; see our honest Rectangle and Magnet comparisons.
Custom zones with Screen Divider
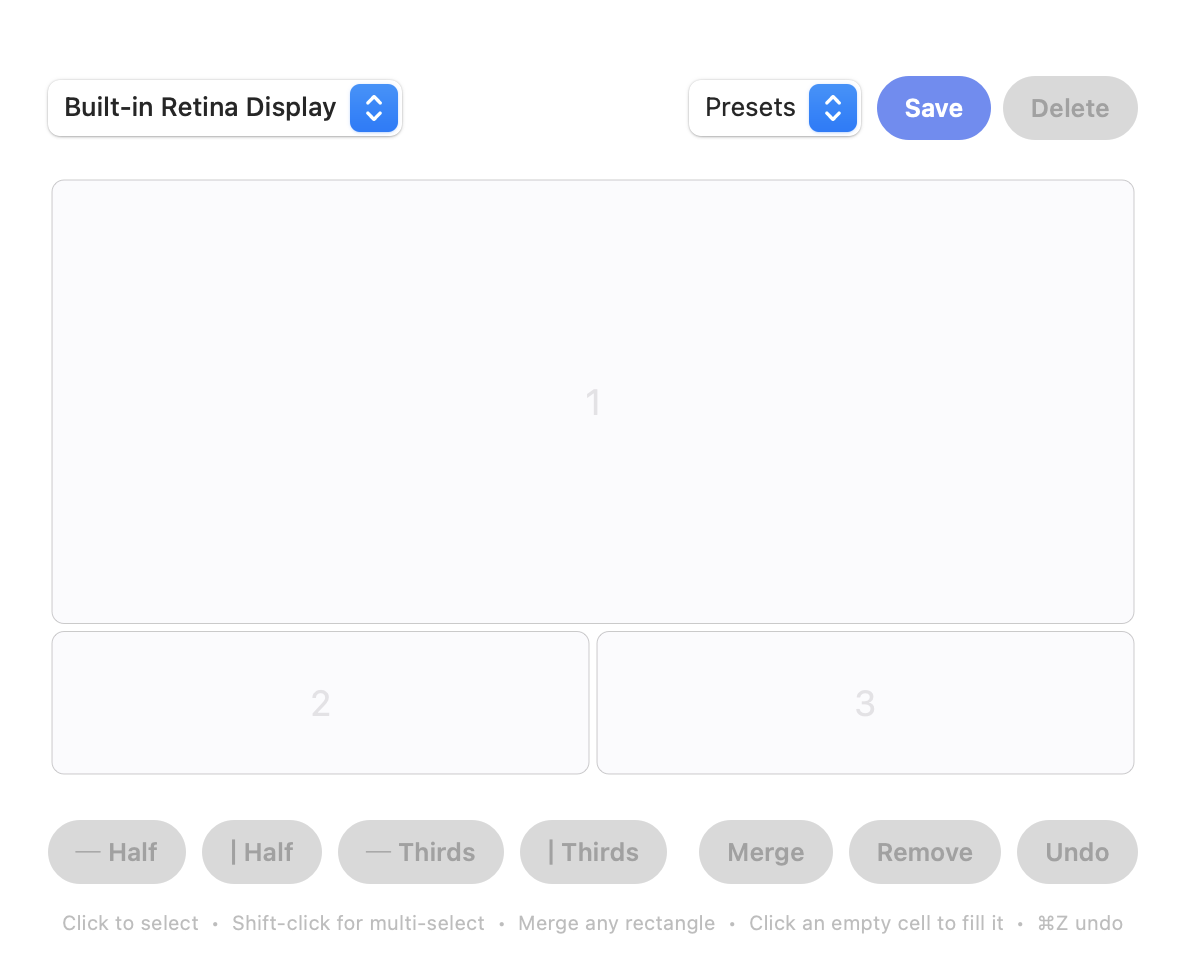
When halves and quarters don’t fit how you work, a zone-based tool does. In Screen Divider you split the screen in a visual editor as finely as you like, then merge any rectangle of cells into a single zone, like a big main area on top with two panels underneath:
- Install it and grant Accessibility access when macOS asks (every window manager needs this).
- Open the layout editor from the menu bar, split the screen and merge cells into zones.
- Drag any window toward a zone and let go. It snaps in and resizes to fill it.
Each display keeps its own layout, and it runs on macOS 13 Ventura or later, so it also covers Macs that don’t have Sequoia’s tiling. For more ways to arrange windows, see how to snap windows on a Mac.
FAQ
Does macOS have window tiling built in?
Yes, from macOS Sequoia (macOS 15) on. Drag a window to a screen edge or corner, hold Option while dragging, use the green button, or use Window › Move & Resize.
What is the keyboard shortcut to tile windows on a Mac?
Fn-Control-Arrow moves a window to the left, right, top or bottom half, Fn-Control-F fills the screen and Fn-Control-R returns it to its previous size, per Apple’s Mac User Guide.
How do I turn off window tiling on Mac?
System Settings › Desktop & Dock › Windows. Turn off “Drag windows to left or right edge of screen to tile” and, if you like, the menu bar and Option-key switches.
Can macOS tile windows into thirds?
Not with the built-in tiling, which does halves, quarters and full screen. Apps like Rectangle, Magnet or Screen Divider handle thirds and custom zones.